-
- Annonces
-
-
Bienvenue sur le forum Renault Laguna
-
mes voitures actuelle
31 messages
• Page 2 sur 3 • 1, 2, 3
31 messages
• Page 2 sur 3 • 1, 2, 3
-
- Advertisement
Retourner vers Vidéos & Images : monde de l'automobile
-
- Articles en relation
- Réponses
- Vus
- Dernier message
-
- Les voitures star du cinéma
par tusik21 » Mer Juil 20, 2011 14:54 - 13 Réponses
- 10768 Vus
- Dernier message par manu76

Sam Juil 27, 2013 11:11
- Les voitures star du cinéma
-
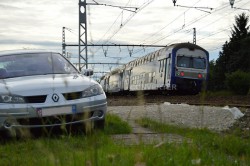
- Les voitures trains.... sont fous ces Anglais
par LagunaWomen » Jeu Oct 03, 2013 11:39 - 4 Réponses
- 8238 Vus
- Dernier message par ludovic29
Jeu Oct 03, 2013 19:35
- Les voitures trains.... sont fous ces Anglais
Qui est en ligne
Utilisateurs parcourant ce forum: Aucun utilisateur enregistré et 0 invités
-
- Photo du mois
-
- Articles récents
30 ans Renault Laguna [2/5] : retour sur la Laguna 2 (2001 – 2007)
30 ans Renault Laguna [1/5] : retour sur la Laguna 1 (1994 – 2000)
Alpine : Enfin dévoilée en « vrai » !
Concours photo Mars 2016 : Thème libre
Concours photo février 2016 : Thème libre
Renault : La nouvelle Alpine renaît enfin !
Concours photo Janvier 2016 : « Votre Laguna en fête »
Renault : Clap de fin presque officiel pour Laguna…
Concours photo Novembre 2014 : « Votre Laguna et votre passion »
Concours photo Octobre 2014 : « Votre Laguna en sépia »
-
- Publicité
-
- Commentaires récents
Commentaires sur Motorisations Laguna 1 par Jmjm817
Commentaires sur Historique de la Laguna II par Sacha31
Commentaires sur Historique de la Laguna II par Hastings
Commentaires sur La carte main libre par baloo55
Commentaires sur Historique de la Laguna II par SEBF
Commentaires sur La Phase II par Philippe03
Commentaires sur Historique par Alexandre022
Commentaires sur Historique de la Laguna III par xdp
Commentaires sur Historique de la Laguna III par xdp
Commentaires sur La carte main libre par lindien85
-
- Publicité
- Index du forum
- L’équipe du forum • Supprimer les cookies du forum • Heures au format UTC + 1 heure [ Heure d’été ]
